Showing posts with label tips. Show all posts

Tuesday, February 26, 2008

Operate Firefox faster with Shortcuts

These are short and simple tips to make browsing easier. Middle-click refers to pushing down the mouse wheel in the center of your mouse, if your mouse wheel does not support middle-clicking then Crtl+left-click works the same. Laptops utilize both left+right-click as the middle-click button.


Open a blank 'New Tab'
Double-click empty space on the Tab Bar


Open a bookmark in a new tab
Middle-click on the bookmark


Close a tab
Middle-click on the tab will close it


Open your homepage in a new tab
Middle-click on the homepage button to open your homepage in a new tab


Navigate tabs with the keyboard
Ctrl+Tab to navigate tabs to the right.
Crtl+Shift+Tab to navigate the tabs to the left.
Even quicker way is Ctrl+[# of tab]


Set mutliple Home pages
Tools---->Options--->General and seperate each page with the pipe | symbol
(Shift+button above the enter button)
eg. http://forums.mozillazine.org|http://www.google.com|


Rearrange add/remove Icons on the toolbar
Toolbars: View--->ToolBars--->Customize


Let Firefox complete web addresses for you
Type in something like 'yahoo' in the address bar and hit:
Ctrl+Enter to add . before and .com after the text
Similarly, Shift+Enter will add . and .net
and Ctrl+Shift+Enter will add . and .org


Bookmark the current page
3 Simple ways:
  • Hit Ctrl+D,
  • drag the icon from the location bar to your Bookmarks folder,
  • or you can drag the icon to the desktop to make an shorcut for that page


Increase/Decrease font size
Hold Ctrl AND press + or -


Save all open tabs in a bookmark folder
Ctl-D or Bookmarks--->Bookmark This Page, select the "bookmark all tabs in a folder", then select or create a folder


Stop animated gifs from moving
Press the ESC key


Bookmark an Livebookmark (RSS Feed) if the site offers them
Click the orange button on the status bar and select 'subscribe to rss feed'


Add a keyword for a bookmark
You can give "keywords" to your bookmarks by right-clicking the bookmark and then Properties. If you put a string in the keyword field now you can type that keyword in the address bar and it will go to that bookmark. For example, if I have a bookmark for Fox News website, I might give it the keyword "news". Now, when I type "news" in the address bar and hit 'enter', the Fox News site is loaded.


Wednesday, February 20, 2008

How to setup and assembly CISS for Epson R210/230 Printer

The following is a mini-guide on how to setup the CISS for 6-color Epson R210/R230 printer. (4-color CISS setup is almost similar)

Preparation
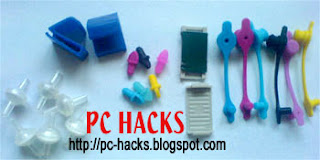
You will need a syringe that can be bought from any Mercury drug store. One syringe is enough. Below is a photo of the accessories that should come with your CISS.


Ink Filling
You need to extract only 60ml of ink into the syringe and start filling each tank with the appropriate ink. (just wash the syringe for each ink transfer)


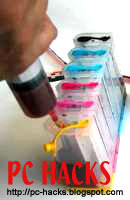
Once the tanks are filled, close the ink hole with the rubber stopper (they are color coded anyway) then lay the tanks in such a way that the air hole is above the ink hole. Now is the time for you to insert the syringe in the air hole and start sucking air slowly. You will notice that the ink from the tank will flow automatically to the cartridges. Please ensure that the smaller rubber stopper are already in place on the cartridges. (see the below picture)


Once done, just close the air hole or place the air filter on each hole.


CISS Installation

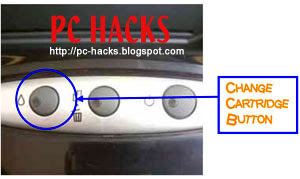
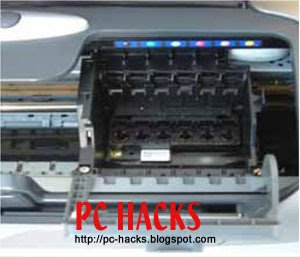
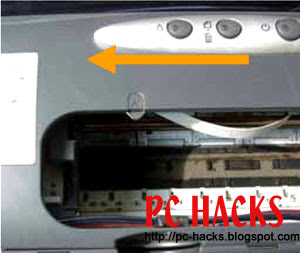
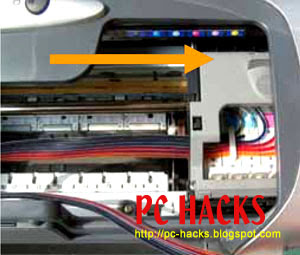
Turn on your printer and press the cartridge change button as shown on the picture below. The cartridge holder will move into the middle of the printer. With the power still on, remove the power cable from the back of the printer. This will allow the printer head to move freely back and forth in the printer.


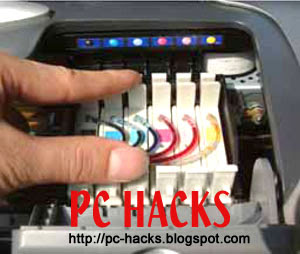
Open that cartridge holder and remove the current cartridges from the printer. Insert the CISS cartridges into your printer. PLEASE ENSURE THAT THE CARTRIDGES ARE PLACED IN THE CORRECT COLOR CARTRIDGE HOLDER.


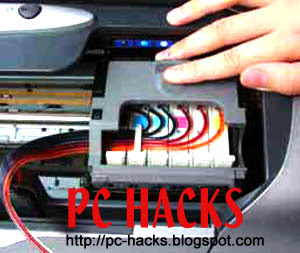
Close the cartridge holder ensuring not to twist any of the tubing.


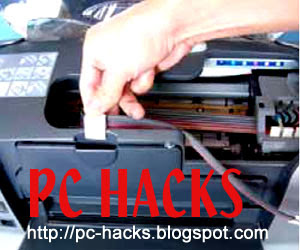
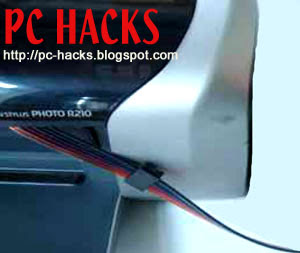
Place the tube clip onto the front of the printer. It should be placed so that the back of the clip is slotted into the groove of the CD printing tray. Be careful not to twist the tubing in any way.


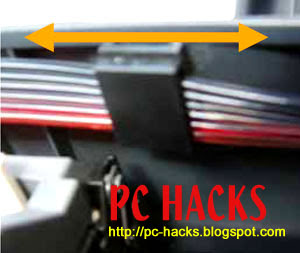
Adjustments to the tube length may be required. To check this, move the cartridge holder left and right to each end of the printer. It should reach both ends with ease. Check that the tubing is neither too long nor to short. The tubing should not interfere with the printer data wire nor should it fall down into the paper support


If required, adjust the tube length by gently pulling the tubing thru the clip in the direction required.


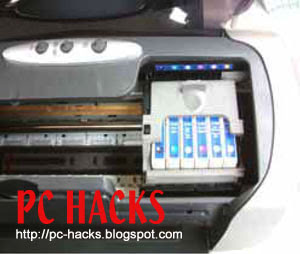
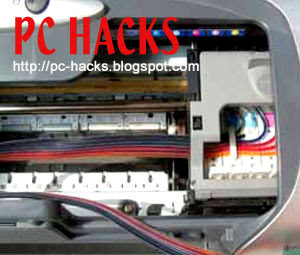
Run the tubing along the inside of the printer as shown below. Remove the backing to the tape on the clip assembly (see the accessories pic) and place it like shown below.


Reconnect the power cable to the rear of your printer and perform a head clean and nozzle check. Please bear in mind that this may need to be performed several times until you get a good test print.

CAUTION: DO NOT PLACE THE TANKS HIGHER OR LOWER THAN THE PRINTER. This will affect the ink flow and may cause ink flooding.

I hope this is easy enough for you.

Friday, February 1, 2008

How To Repairing Corrupt .RAR/.ZIP Archive


Here's the steps for repairing a corrupt .RAR/.ZIP Archive file:

  1. Open WinRAR and browse to the folder with your .rar/.zip file.
  2. Highlight the file and click the Repair button from the tool bar.
  3. In the pop-up window, select "Treat the corrupt archive as RAR/ZIP" depending on which type of archive you are trying to repair.
  4. You may get a "Suspicious Entry" pop-up. If so, select All. This may happen several times while repairing.
  5. After WinRAR has completed repairing the archive, click on Close.
  6. To extract your file, highlight your new rebuilt archive.
  7. Next select Commands>Extract without confirmation
  8. The files will start extracting.
  9. The archived files will be extracted to the same folder as the repaired archive.


That's all !

Source: Adam Roper


Friday, September 21, 2007

Google Searching Secrets

Tired to search and got nothing ?
Here the secrets for searching in Google:

Method 1


Put this string in Google search:

"parent directory " /appz/ -xxx -html -htm -php -shtml -opendivx -md5 -md5sums

"parent directory " DVDRip -xxx -html -htm -php -shtml -opendivx -md5 -md5sums

"parent directory "Xvid -xxx -html -htm -php -shtml -opendivx -md5 -md5sums

"parent directory " Gamez -xxx -html -htm -php -shtml -opendivx -md5 -md5sums

"parent directory " MP3 -xxx -html -htm -php -shtml -opendivx -md5 -md5sums

"parent directory " Name of Singer or album -xxx -html -htm -php -shtml -opendivx -md5 -md5sums

Notice that i am only changing the word after the parent directory, change it to what you want and you will get a lot of stuff.


Method 2

Put this string in Google search:

?intitle:index.of? mp3

You only need add the name of the song/artist/singer.

Example: ?intitle:index.of? mp3 britney


Monday, August 20, 2007

SP2 Tweaks

Here some tweaks for your Windows XP-SP2:

Disable the SP antivirus and firewall functions - and keep XP from nagging about it:

[HKEY_LOCAL_MACHINE\SOFTWARE\Microsoft\Security Center]
"AntiVirusDisableNotify"=dword:00000001
"FirewallDisableNotify"=dword:00000001
; don't monitor firewall and antivirus
"AntiVirusOverride"=dword:00000001
"FirewallOverride"=dword:00000001

Disable antivirus and firewall check at boot time

SP2 enables Auto Updates by default. This is good for you, but some folks disagree, so here is how to turn it off:


[HKEY_LOCAL_MACHINE\SOFTWARE\Microsoft\Windows\CurrentVersion\WindowsUpdate\Auto Update]
"AUOptions"=dword:00000001
;disable Auto Update
[HKEY_LOCAL_MACHINE\SOFTWARE\Microsoft\Security Center]
"UpdatesDisableNotify"=dword:00000001
;Stop nagging about AU being turned off

How to turn off the SP2 firewall (if you must):

[HKEY_LOCAL_MACHINE\SOFTWARE\Policies\Microsoft\WindowsFirewall\DomainProfile]
"EnableFirewall"=dword:00000000
; turn off firewall policy for domain profile
[HKEY_LOCAL_MACHINE\SOFTWARE\Policies\Microsoft\WindowsFirewall\StandardProfile]
"EnableFirewall"=dword:00000000
;disable firewall policy for standard profile

Change some popup settings:

[HKEY_LOCAL_MACHINE\SOFTWARE\Microsoft\Windows\CurrentVersion\Internet Settings\Zones\0]
"1001"=dword:00000001
"1004"=dword:00000001
"1200"=dword:00000000
"1809"=dword:00000003
;turn off IE popup blocker and return activeX handling to pre-SP2 setting for local system and current user
;1001 = 1 (prompt before download signed ActiveX)
;1004 = 1 (prompt before downloading unsigned ActiveX)
;1200 = 0 (prompt before download signed ActiveX)
;1809 = 3 (disable popup blocking)
[HKEY_LOCAL_MACHINE\SOFTWARE\Microsoft\Windows\CurrentVersion\Internet Settings\Zones\1]
"1001"=dword:00000001
"1004"=dword:00000001
"1200"=dword:00000000
"1809"=dword:00000003
[HKEY_LOCAL_MACHINE\SOFTWARE\Microsoft\Windows\CurrentVersion\Internet Settings\Zones\2]
"1001"=dword:00000001
"1004"=dword:00000001
"1200"=dword:00000000
"1809"=dword:00000003
[HKEY_LOCAL_MACHINE\SOFTWARE\Microsoft\Windows\CurrentVersion\Internet Settings\Zones\3]
"1001"=dword:00000001
"1004"=dword:00000001
"1200"=dword:00000000
"1809"=dword:00000003
[HKEY_LOCAL_MACHINE\SOFTWARE\Microsoft\Windows\CurrentVersion\Internet Settings\Zones\4]
"1001"=dword:00000001
"1004"=dword:00000001
"1200"=dword:00000000
"1809"=dword:00000003
[HKEY_CURRENT_USER\Software\Microsoft\Windows\CurrentVersion\Internet Settings\Zones\0]
"1001"=dword:00000001
"1004"=dword:00000001
"1200"=dword:00000000
"1809"=dword:00000003
[HKEY_CURRENT_USER\Software\Microsoft\Windows\CurrentVersion\Internet Settings\Zones\1]
"1001"=dword:00000001
"1004"=dword:00000001
"1200"=dword:00000000
"1809"=dword:00000003
[HKEY_CURRENT_USER\Software\Microsoft\Windows\CurrentVersion\Internet Settings\Zones\2]
"1001"=dword:00000001
"1004"=dword:00000001
"1200"=dword:00000000
"1809"=dword:00000003
[HKEY_CURRENT_USER\Software\Microsoft\Windows\CurrentVersion\Internet Settings\Zones\3]
"1001"=dword:00000001
"1004"=dword:00000001
"1200"=dword:00000000
"1809"=dword:00000003
[HKEY_CURRENT_USER\Software\Microsoft\Windows\CurrentVersion\Internet Settings\Zones\4]
"1001"=dword:00000001
"1004"=dword:00000001
"1200"=dword:00000000
"1809"=dword:00000003

Or you can disable Security Center altogether by disabling the wscsvc service.

[HKEY_LOCAL_MACHINE\SYSTEM\CurrentControlSet\Services\wscsvc]
"Start"=dword:00000004
;Disable Security Center

How To Delete An "undeletable" File

Open a Command Prompt window and leave it open.
Close all open programs.
Click Start, Run and enter TASKMGR.EXE
Go to the Processes tab and End Process on Explorer.exe.
Leave Task Manager open.
Go back to the Command Prompt window and change to the directory the AVI (or other undeletable file) is located in.
At the command prompt type DEL where is the file you wish to delete.
Go back to Task Manager, click File, New Task and enter EXPLORER.EXE to restart the GUI shell.
Close Task Manager.


Or you can try this

Open Notepad.exe

Click File>Save As..>

locate the folder where ur undeletable file is

Choose 'All files' from the file type box

click once on the file u wanna delete so its name appears in the 'filename' box

put a " at the start and end of the filename
(the filename should have the extension of the undeletable file so it will overwrite it)

click save,

It should ask u to overwrite the existing file, choose yes and u can delete it as normal.


Here's a manual way of doing it. I'll take this off once you put into your first post zain.

1. Start
2. Run
3. Type: command
4. To move into a directory type: cd c:\*** (The stars stand for your folder)
5. If you cannot access the folder because it has spaces for example Program Files or Kazaa Lite folder you have to do the following. instead of typing in the full folder name only take the first 6 letters then put a ~ and then 1 without spaces. Example: cd c:\progra~1\kazaal~1
6. Once your in the folder the non-deletable file it in type in dir - a list will come up with everything inside.
7. Now to delete the file type in del ***.bmp, txt, jpg, avi, etc... And if the file name has spaces you would use the special 1st 6 letters followed by a ~ and a 1 rule. Example: if your file name was bad file.bmp you would type once in the specific folder thorugh command, del badfil~1.bmp and your file should be gone. Make sure to type in the correct extension.

Converting to NTFS

Your hard drive must be formatted with a file system such as FAT, FAT32 or NTFS so that Windows can be installed on to it. This system determines how files are named, organised and stored on the drive. If you’re not using it already, NTFS (New Technology File System) is recommended for Windows XP because of the additional functionality it offers. If your PC came with Windows XP pre-installed then there’s a chance that you’re already using NTFS. If you’ve upgraded from Windows 98 or Windows Me you may still be using FAT or FAT 32. The option to change over to NTFS would have been available during the upgrade process. Don’t worry if you skipped this as it’s possible to convert at any time from within Windows XP without losing any data.

The recommended option
There are a number of features in Windows XP that will only work if the NTFS file system is present, which is why it’s suggested you make use of it. File and folder permissions, encryption and privacy options are just some of those you’ll be able to access. In particular, those of you who have set up user accounts will find NTFS invaluable. For instance, if you continue to use FAT or FAT32 anyone with physical access to the drive will be able to access the files and folders that are stored there. However, with NTFS you’ll be able to use a level of encryption (Professional Edition only) that will enable you to protect your data.

You’ll also find NTFS more reliable in that it’s more able to recover from disk errors than its FAT or FAT32 counterparts. A log of all disk activity is kept so should a crash occur, Windows XP can use this information to repair the file system when your PC boots up again. To find out what file system you’re using, open My Computer, right-click your main hard drive and choose Properties. Take a look at the General tab to see confirmation of the file system that’s in use.

Convert now
You can use the convert tool in Windows XP to change the file system on your hard disk from FAT or FAT32 to NTFS. The whole process is safe and your existing data won’t be destroyed. To begin, click Start -> Run, type cmd and press [Return]. At the command prompt type convert c: /fs:ntfs and press [Return] (where ‘c’ is the letter of the drive you’re converting). When you try and run the convert utility, it’s likely that Windows XP will be using your paging file so the process won’t be completed immediately. Therefore, you’ll see a brief message on screen informing you that the conversion will take place instead the next time Windows starts up. Having restarted, the Check Disk utility will run, the conversion will be performed automatically and you may find that your PC will reboot twice more.

The benefits
With your drive now running NTFS, it’s time to take advantage of the new options that are available. Having created a number of different user accounts you can now control the level of access that’s granted to individual users. For example, there are going to be certain files and folders that you’ll want some users to be able to access but not others. If you have Windows XP Professional Edition you can do this immediately.

Right-click any file or folder, choose Properties and select the Security tab. A dialog will be displayed showing the names of all your users. Alongside will be two columns which enable you to select levels of access for each of them, the permissions include Full Control, Modify, Read and Write. You can then check the appropriate box to determine whether or not to Allow or Deny a particular permission. For Windows XP Home Edition users, the Security tab won’t be immediately available. To access this option you’ll need to restart your PC, pressing [F8] until a menu appears. Next select Safe Mode and wait for Windows XP to start up. You can then set your options in the same way.

Another feature is NTFS compression. It’s quick and seamless as your file or folder is decompressed automatically when you access it. (Don’t confuse this with a Zip compression utility where the files need to be extracted before they can be accessed.) Although you may have used NTFS compression on a file or folder, there’s no way of telling just by looking at it. To remedy this, open My Computer, click Tools -> Folder Options and select the View tab. Under Advanced settings, scroll down and check the option ‘Show encrypted or compressed NTFS files in color’, then click Apply and OK. Take a look at your compressed items in My Computer and you’ll see the text label has changed from black to blue. Something else that’s exclusive to Professional Edition users is the Encrypting File System (EFS). You can use this to protect your important data so that no one else can read it. Your encrypted files and folders will only be accessible when you have logged into your user account successfully.

Change the Location Of 'My Documents'

I just found out about this today, and I use Windows XP for some time now, so i guess there are others out there who don't know about this yet.

But normally windows saves the "My Documents" folder on your C-drive. But when you right-click on it and go to properties, you can change the location where you want windows to save your Documents folder.
I have a partition set up with just windows on it, and all my things i want to keep are on different partitions/disks. So now I put My Documents on another partition than where I have windows installed. If windows screws up and you have to format your C-drive again, your documents will be spared at least...

How To Change The Default Location For Installing Apps

As the size of hardrives increase, more people are using partitions to seperate and store groups of files.

XP uses the C:\Program Files directory as the default base directory into which new programs are installed. However, you can change the default installation drive and/ or directory by using a Registry hack.

Run the Registry Editor (regedit)and go to

HKEY_LOCAL_MACHINE\SOFTWARE\Microsoft\Windows\CurrentVersion

Look for the value named ProgramFilesDir. by default,this value will be C:\Program Files. Edit the value to any valid drive or folder and XP will use that new location as the default installation directory for new programs.