The System Recovery Options menu Windows Vista contains several tools that can help you recover Windows from a serious error. You can perform repairs to the files that Windows uses to start itself, perform a restore operation using System Restore, and restore your entire computer and system files using backups that you have made previously.
 The Recovery Console in earlier versions of Windows has been removed in Vista and replaced by several tools located in the System Recovery Options menu. The System Recovery Options menu is on the Windows installation disc. The menu might also be installed on your hard disk if your computer has pre-installed recovery options.
Here are the tools you can use to recover your system:
Startup Repair
Fixes certain problems, such as missing or damaged system files that might prevent Windows from starting correctly. When you run Startup Repair, it scans your computer for the problem and then tries to fix it so your computer can start correctly.
System Restore
This option helps you restore your computer's system files to an earlier point in time. It's a way to undo system changes to your computer without affecting your personal files, such as e-mail, documents, or photos. If you use System Restore when the computer is in safe mode, you cannot undo the restore operation. However, you can run System Restore again and choose a different restore point if one exists.
Windows Complete PC Restore
Restores the contents of your hard disk from a backup. Windows Complete PC Backup and Restore is not included with Windows Vista Starter, Windows Vista Home Basic, or Windows Vista Home Premium.
Windows Memory Diagnostic Tool
Scans your computer's memory for errors.
Command Prompt
Command Prompt replaces the Recovery Console from earlier versions of Windows. Advanced users can use Command Prompt to perform recovery-related operations and also run other command line tools for diagnosing and troubleshooting problems.
For more detailed information on how to use these tools type in the name of the tool in Windows help.
To access the System Recovery Options menu
- If you have a Windows installation disc:
- Insert the installation disc.
- Restart your computer.
If prompted, press any key to start Windows from the installation disc. If your computer is not configured to start from a CD or DVD, check your BIOS settings.
- Choose your language settings, and then click Next.
- Click Repair your computer.
- Select the operating system you want to repair, and then click Next.
- On the System Recovery Options menu, click a tool to open it.
If your computer has preinstalled recovery options:
- Remove all floppy disks from your computer, and then restart your computer.
- Do one of the following:
- If your computer has a single operating system installed, press and hold the F8 key as your computer restarts. You need to press F8 before the Windows logo appears. If the Windows logo appears, you will need to try again by waiting until the Windows logon prompt appears, and then shutting down and restarting your computer.
- If your computer has more than one operating system, use the arrow keys to highlight the operating system you want to repair, and then press and hold F8.
- On the Advanced Boot Options screen, use the arrow keys to highlight Repair your computer, and then press Enter.
- Select a keyboard layout, and then click Next.
- Select a user name and enter the password, and then click OK.
- On the System Recovery Options menu, click a tool to open it.
User Account Control (UAC) is a feature in Windows Vista that can help prevent unauthorized changes to your computer. UAC does this by asking you for permission or an administrator* password before performing actions that could potentially affect your computer's operation or that change settings that affect other users.
UAC will alert you with one of the following messages:
Windows needs your permission to continue
A Windows function or program that can affect other users of this computer needs your permission to start. Make sure to ensure that it's a function or program you want to run.
A program needs your permission to continue
This will happen when a program that's not part of Windows needs your permission to start. It has a valid digital signature indicating its name and its publisher, which helps to ensure that the program is what it claims to be. Make sure that this is a program that you intended to run.
An unidentified program wants access to your computer
This is caused by a program that your administrator has specifically blocked from running on your computer is trying to run. To run this program, you must have an administrator unblock it.
 The main reason to use UAC is to prevent malware and spyware from installing or making changes to your computer without your permission. This comes in handy when you have users who may go to inappropriate websites or download software from the Internet that may be of risk to their computer. If you trust your users or if its just you that will be using your computer and you are confident that you will not be installing anything you shouldn’t then you can turn this feature off.
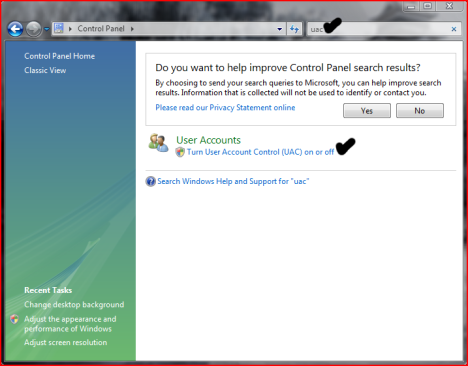
Here is how you turn the User Account Control feature off:
- Open User Accounts from Control Panel.
- Click on turn User Account Control on or off.
- Uncheck the box that says Use User Account Control (UAC) to help protect your computer.
- Click Ok. You may have to enter administrator credentials depending on who you are logged in as.
- Restart your computer for the changes to take effect.
1. Does your computer support booting from USB ?
?
Usually, if its an option in your BIOS boot sequence menu, the answer to this is yes. If its not there, look for BIOS updates. If you are not sure, proceed and see what happens
2. Sorting out the "Bootability" of your USB-Drive
Connect your USB drive to your computer, directly, without a Hub. Then, shut down your computer, disconnect any other hard disk drives from it, and insert your original Windows XP CD into the drive. Start the installation, and proceed to the section where you are allowed to pick a hard drive. If it goes beyond the partition selection, your drive is already fine for booting Windows XP. If not (seems to be the cases with many of the Freecom USB HDDs for example), you will get an error like "Windows is unable to find your drive, partition, data etc bla". This is usually not a big problem.
 All you need to do is "properly" format the drive. Reboot into your normal Windows, and get this HP tool
 , and use it to format your HDD completely. I chose NTFS format, worked fine everytime i tried. After this, my drives are recognized as valid installation devices by the Windows XP installer.
(In fact, i did not manage to create a USB primary partition with FAT32 that was recognized as being installable)
3. Dumping the original Windows CD into an ISO File
Pretty easy one. Simply open WinISO, and select Actions -> Make ISO from CDROM, and save your CD image.
4. Extracting the files we need to work on
After the CD dump is done, close and reopen WinISO. Then, open the ISO file you just created using File -> Open.
Now, click the I386 folder, and select the following files (Ctrl key to multi-select)
TXTSETUP.SIF
DOSNET.INF
USB.IN_
USBPORT.IN_
USBSTOR.IN_
Select Actions -> Extract and put the resulting files into some folder to work on them.
5. Unpacking IN_ files
Use the Cab SDK (from the command line) for extracting the contents of the .IN_ files. Each of them contains exactly one .inf file. If you are unsure how to use the Cab SDK, here is an example command line:
cabarc x USBSTOR.IN_
You should end up with three new files in the folder, called:
usb.inf
usbport.inf
usbstor.inf
You can now delete the .IN_ files.
6. Editing the files
This is the main job. i ll also try to explain a bit whats happening. Use a simple Texteditor like Notepad.
TXTSETUP.SIF
This file is loaded on the initial install step by the Windows XP CD installer. In this file, we will change the way Windows treats USB devices during system setup -- the default is to only treat them as input devices during installation -- we will change this to include mass storage driver support (which needs to be loaded into the installer much earlier in order to work).
First, move the following entries from [InputDevicesSupport.Load] to the [BootBusExtenders.Load] section , as shown here
[BootBusExtenders.Load]
pci = pci.sys
acpi = acpi.sys
isapnp = isapnp.sys
acpiec = acpiec.sys
ohci1394 = ohci1394.sys
usbehci = usbehci.sys
usbohci = usbohci.sys
usbuhci = usbuhci.sys
usbhub = usbhub.sys
usbstor = usbstor.sys
[InputDevicesSupport.Load]
usbehci = usbehci.sys
usbohci = usbohci.sys
usbuhci = usbuhci.sys
usbhub = usbhub.sys
usbccgp = usbccgp.sys
hidusb = hidusb.sys
serial = serial.sys
serenum = serenum.sys
usbstor = usbstor.sys
... now the same for [BootBusExtenders] and [InputDevicesSupport]
[BootBusExtenders]
pci = "PCI-Bustreiber",files.pci,pci
acpi = "ACPI Plug & Play-Bustreiber",files.acpi,acpi
isapnp = "ISA Plug & Play-Bustreiber",files.isapnp,isapnp
acpiec = "Integrierter ACPI-Controllertreiber",files.none,acpiec
ohci1394 = "IEEE-1394-Bus-OHCI-konformer Anschlusstreiber",files.ohci1394,ohci1394
usbehci = "Erweiterter Hostcontroller",files.usbehci,usbehci
usbohci = "Open Hostcontroller",files.usbohci,usbohci
usbuhci = "Universeller Hostcontroller",files.usbuhci,usbuhci
usbhub = "Standard-USB-Hubtreiber",files.usbhub,usbhub
usbstor = "USB-Speicherklassentreiber",files.usbstor,usbstor
[InputDevicesSupport]
usbehci = "Erweiterter Hostcontroller",files.usbehci,usbehci
usbohci = "Open Hostcontroller",files.usbohci,usbohci
usbuhci = "Universeller Hostcontroller",files.usbuhci,usbuhci
usbhub = "Standard-USB-Hubtreiber",files.usbhub,usbhub
hidusb = "HID-Parser",files.hidusb,hidusb
serial = "Treiber fur seriellen Anschluss",files.none,serial
serenum = "Enumerator fur seriellen Anschluss",files.none,serenum
usbstor = "USB-Speicherklassentreiber",files.usbstor,usbstor
usbccgp = "USB Generic Parent Driver",files.usbccgp,usbccgp
Next, we also have to write several keys into the registry. Convieniently, the txtsetup.sif allows you to specify files that are parsed and instered into the registry at install time. Insert the following in the [HiveInfs.Fresh] section:
[HiveInfs.Fresh]
AddReg = hivedef.inf,AddReg
AddReg = hivesys.inf,AddReg
AddReg = hivesft.inf,AddReg
AddReg = hivecls.inf,AddReg
AddReg = hiveusd.inf,AddReg
AddReg = dmreg.inf,DM.AddReg
AddReg = usbboot.inf,usbservices
and also in [SourceDisksFiles]
[SourceDisksFiles]
usbboot.inf = 1,,,,,,_x,3,,3
bootvid.dll = 1,,,,,,3_,2,0,0,,1,2
kdcom.dll = 1,,,,,,3_,2,0,0,,1,2
Finally, save and close TXTSETUP.SIF. We are done with it.
DOSNET.INF
Now, open DOSNET.INF , and change the second [Files] section to look like this:
[Files]
d1,usbboot.inf
d1,_default.pif
d1,12520437.cpx
d1,12520850.cpx
usb.inf
Change the bolded lines in the [StandardHub.AddService] and [CommonClassParent.AddService] sections:
[StandardHub.AddService]
DisplayName = %StandardHub.SvcDesc%
ServiceType = 1 ; SERVICE_KERNEL_DRIVER
StartType = 0 ; SERVICE_DEMAND_START
ErrorControl = 1 ; SERVICE_ERROR_NORMAL
ServiceBinary = %12%\usbhub.sys
LoadOrderGroup = Boot Bus Extender
[CommonClassParent.AddService]
DisplayName = %GenericParent.SvcDesc%
ServiceType = 1 ; SERVICE_KERNEL_DRIVER
StartType = 0 ; SERVICE_DEMAND_START
ErrorControl = 1 ; SERVICE_ERROR_NORMAL
ServiceBinary = %12%\usbccgp.sys
LoadOrderGroup = Boot Bus Extender
usbport.inf
Change the bolded lines in the [EHCI.AddService], [OHCI.AddService] , [UHCI.AddService] and [ROOTHUB.AddService] sections:
[EHCI.AddService]
DisplayName = %EHCIMP.SvcDesc%
ServiceType = 1 ; SERVICE_KERNEL_DRIVER
StartType = 0 ; SERVICE_DEMAND_START
ErrorControl = 1 ; SERVICE_ERROR_NORMAL
ServiceBinary = %12%\usbehci.sys
LoadOrderGroup = Boot Bus Extender
[OHCI.AddService]
DisplayName = %OHCIMP.SvcDesc%
ServiceType = 1 ; SERVICE_KERNEL_DRIVER
StartType = 0 ; SERVICE_DEMAND_START
ErrorControl = 1 ; SERVICE_ERROR_NORMAL
ServiceBinary = %12%\usbohci.sys
LoadOrderGroup = Boot Bus Extender
[UHCI.AddService]
DisplayName = %UHCIMP.SvcDesc%
ServiceType = 1 ; SERVICE_KERNEL_DRIVER
StartType = 0 ; SERVICE_DEMAND_START
ErrorControl = 1 ; SERVICE_ERROR_NORMAL
ServiceBinary = %12%\usbuhci.sys
LoadOrderGroup = Boot Bus Extender
[ROOTHUB.AddService]
DisplayName = %ROOTHUB.SvcDesc%
ServiceType = 1 ; SERVICE_KERNEL_DRIVER
StartType = 0 ; SERVICE_DEMAND_START
ErrorControl = 1 ; SERVICE_ERROR_NORMAL
ServiceBinary = %12%\usbhub.sys
LoadOrderGroup = Boot Bus Extender
usbstor.inf
Change / Add [USBSTOR.AddService] section to this:
[USBSTOR.AddService]
DisplayName = %USBSTOR.SvcDesc%
ServiceType = 1
StartType = 0
Tag = 3
ErrorControl = 1
ServiceBinary = %12%\USBSTOR.SYS
LoadOrderGroup = Boot Bus Extender
new file: USBBOOT.INF
Create a new file called USBBOOT.INF in the same directory as your other changed files, and put the following content into it:
[usbservices]
HKLM,"SYSTEM\CurrentControlSet\Services\USBSTOR","DisplayName",0x00000000,"USB Mass Storage Driver"
HKLM,"SYSTEM\CurrentControlSet\Services\USBSTOR","ErrorControl",0x00010001,1
HKLM,"SYSTEM\CurrentControlSet\Services\USBSTOR","Group",0x00000000,"System Reserved"
HKLM,"SYSTEM\CurrentControlSet\Services\USBSTOR","ImagePath",0x00020000,"system32\DRIVERS\USBSTOR.SYS"
HKLM,"SYSTEM\CurrentControlSet\Services\USBSTOR","Start",0x00010001,0
HKLM,"SYSTEM\CurrentControlSet\Services\USBSTOR","Type",0x00010001,1
HKLM,"SYSTEM\CurrentControlSet\Services\usbehci","DisplayName",0x00000000,"USB 2.0 Enhanced Host Controller Miniport Driver"
HKLM,"SYSTEM\CurrentControlSet\Services\usbehci","ErrorControl",0x00010001,1
HKLM,"SYSTEM\CurrentControlSet\Services\usbehci","Group",0x00000000,"System Reserved"
HKLM,"SYSTEM\CurrentControlSet\Services\usbehci","ImagePath",0x00020000,"system32\DRIVERS\usbehci.sys"
HKLM,"SYSTEM\CurrentControlSet\Services\usbehci","Start",0x00010001,0
HKLM,"SYSTEM\CurrentControlSet\Services\usbehci","Type",0x00010001,1
HKLM,"SYSTEM\CurrentControlSet\Services\usbhub","DisplayName",0x00000000,"USB2 Enabled Hub"
HKLM,"SYSTEM\CurrentControlSet\Services\usbhub","ErrorControl",0x00010001,1
HKLM,"SYSTEM\CurrentControlSet\Services\usbhub","Group",0x00000000,"System Reserved"
HKLM,"SYSTEM\CurrentControlSet\Services\usbhub","ImagePath",0x00020000,"system32\DRIVERS\usbhub.sys"
HKLM,"SYSTEM\CurrentControlSet\Services\usbhub","Start",0x00010001,0
HKLM,"SYSTEM\CurrentControlSet\Services\usbhub","Type",0x00010001,1
HKLM,"SYSTEM\CurrentControlSet\Services\usbuhci","DisplayName",0x00000000,"Microsoft USB Universal Host Controller Miniport Driver"
HKLM,"SYSTEM\CurrentControlSet\Services\usbuhci","ErrorControl",0x00010001,1
HKLM,"SYSTEM\CurrentControlSet\Services\usbuhci","Group",0x00000000,"System Reserved"
HKLM,"SYSTEM\CurrentControlSet\Services\usbuhci","ImagePath",0x00020000,"system32\DRIVERS\usbuhci.sys"
HKLM,"SYSTEM\CurrentControlSet\Services\usbuhci","Start",0x00010001,0
HKLM,"SYSTEM\CurrentControlSet\Services\usbuhci","Type",0x00010001,1
HKLM,"SYSTEM\CurrentControlSet\Services\usbohci","DisplayName",0x00000000,"Microsoft USB Open Host Controller Miniport Driver"
HKLM,"SYSTEM\CurrentControlSet\Services\usbohci","ErrorControl",0x00010001,1
HKLM,"SYSTEM\CurrentControlSet\Services\usbohci","Group",0x00000000,"System Reserved"
HKLM,"SYSTEM\CurrentControlSet\Services\usbohci","ImagePath",0x00020000,"system32\DRIVERS\usbohci.sys"
HKLM,"SYSTEM\CurrentControlSet\Services\usbohci","Start",0x00010001,0
HKLM,"SYSTEM\CurrentControlSet\Services\usbohci","Type",0x00010001,1
7. Repack the inf files into their original IN_ format
If you have not already deleted your extracted .IN_ files, do so now. They need to be replaced. Open a DOS shell again, and navigate to the folder with your changed files. Then exceute the following commands:
cabarc n USB.IN_ usb.inf
cabarc n USBPORT.IN_ usbport.inf
cabarc n USBSTOR.IN_ usbstor.inf
The three IN_ files should now exist again.
Congratulations. All out modifications are done.
8. Inject the changed files into the ISO
Open your Windows CD image again with WinISO. Navigate to the I386 folder, and delete the following files from the ISO, saving the changes to the ISO afterwards:
DOSNET.INF
TXTSETUP.SIF
USB.IN_
USBPORT.IN_
USBSTOR.IN_
Just to be sure all is updated in the ISO, cloase and repoen the ISO in WinISO. Now, again go to the I386 folder and select "Add Files". Now add your changed files, in detail:
USBBOOT.INF
DOSNET.INF
TXTSETUP.SIF
USB.IN_
USBPORT.IN_
USBSTOR.IN_
Save the ISO. You are done.
9. Burn the ISO back to CD
Feel free to use any burning package you want. I used the free and simple Burnatonce
10. Install Windows XP from the CD
Shut down your computer. Disconnect ANY internal and external hard drives (so Windows cannot find them during installation and mess up their Master Boot Records hehe). Some computers will have trouble to boot without an internal HDD attached, check in your BIOS and, if possible, remove the HDD from the boot sequence and set the USB Harddisk as the first boot device, and the CDROM as second.
Also, now connect your USB Harddrive directly to the computer, without any Hubs in between.
Windows should install just fine, with the exceptions noted below.
Issues you will encounter during installation:
During driver installation, the USB drivers will prompt you, as they are "not certified" - This is normal. Our changes invalidated the checksum, and therefore the driver is no longer signed. Just press "yes" a couple of times.
Upon completion of the install, the system will complain once on the first bootup that the pagefile does not exist. You can ignore this for now, as Windows will work fine without it. People are looking at fixing this issue, but its not critical for now.
Once everything is up and running , shut down and reconnect all your drives.
